Steampunk is a secret love of mine and I’ve been part of the Official Edmonton Steampunk Group for over a year now. Annually we do a big photoshoot down at Fort Edmonton park, and this year a small group of us have decided to do “Steampunk Alice in Wonderland”, and I’m doing the Queen of Hearts.
No queen is complete without a crown so, on the off chance that someone may benefit from my experience, I’ve documented my process below. I’ve also included some “Pro Tips”, things that I did that you probably don’t want to do too 🙂

Materials & Tools:
- Cardboard
- Felt
- Ribbon
- Clock Hands
- Gold Jewellery Wire
- 1 inch Gears
- Small Adhesive Jewels
- 1 Sheet of 8×11 White Paper
- Hot Glue Gun
- Scissors
Step One – Base Construction:
I wanted the crown to be small, like a mini top hat. Since I just happened to have a mini top hat laying around, I measured out how large the hat was around and used it to draw out a rectangle on the cardboard (I used the height of the ribbon as height for my cardboard rectangle). When I taped the two ends together I included a small piece of cardboard to put across the seam as a brace for support.

Step Two – Base Finish:
Since I used the height of the ribbon the height of the cardboard, it made it really simple to apply the ribbon. Hot glue it on in sections and wait for it to set before moving on to step three. I also applied a bit of black lace over the ribbon. Since I only had a hot glue gun on hand I only glued down the ends and covered it up with a gear embellishment later.
Pro Tip: Now would be a good time to apply the felt to the inside of the cardboard. I waited until after I had put the clock hands on and it made it a lot harder.
Step Three – Clock Hands:
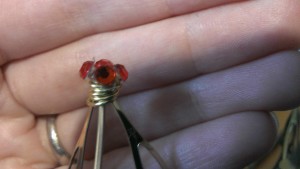
I used the measurements from the cardboard to create a duplicate crown base on the sheet of paper. Then I laid out the design for the clock hands on the flat surface. I purchased two different kinds of clock hands (from this Esty store) and they were different heights. I used the long ones to create the points and I connected them together with the shorter hands on an angle. Once I had the design right, I placed them on the actual crown and hot glued them into place. I also wrapped the gold jewellery wire around where the three clock hands connected at the point for an extra secure hold, as suggested here.

Pro Tip: Because of the way I glued the ribbon on, there were gaps between the cardboard and the ribbon. It made it easier to place the clock hands before gluing by slipping them into this space. I ended up keeping the ends of the shorter ones inside the ribbon and left the longer ones out.
Step Three – Embellishments:
This is a steampunk crown so besides the clock hands I also wanted to have some gears. I got 5 one inch gears from Micheals Craft Store that fit the bill perfect. I placed those in between each of the long clock hands. I hot glued them into place on the ribbon/lace, but each one was connected to the clock hands on either side by the gold wire.
I also had some self adhesive jewels so I used them on the tips. Even though they were self adhesive I used some hot glue to hold them in place over the wire. I also place some in the middle of each gear. Finally, I had a heart shaped bead and I attached it to a smaller gear I had. Then it was, again, hot glued into place on what I considered to be the front of the crown.

Pro Tip: Even if the hot glue is dripping, or came out too fast, do not instinctively try to clean it away with your fingers. It is called hot glue for a reason. I have the burns to prove it 🙂
And that about covers it.
It isn’t the prettiest crown out there and I’m sure someone with more skills (and more than just a hot glue gun at their disposal) could have done a better job, but I’m proud of the way it turned out. And I hope it gives someone else the courage to try to be crafty.
If you use this tutorial, or if you’ve made your own steampunk crown, please link to it in the comments. I would love to see what other people are doing.